Updated: 12/09/2018 | December 9th, 2018
Today, professional photographer Laurence Norah of Finding the Universe, finishes his five-part series on taking better travel photos. In part five, Laurence is giving some simple post-processing techniques that you can use to make your travel photos wow your friends and family! Editing your photos is just as important as how you compose them, so I hope you’re ready to take some notes!
One of the most misunderstood parts of digital photography is what happens after you take the shot: editing your photos, aka post-processing. This is where you edit the images you have taken, to create the final product.
Post-processing is the equivalent of the darkroom from the days we shot in film.
In today’s post, we’re going to be covering some ideas for editing your photos, from the basics (cropping and leveling), through to more complicated actions like recovering shadow and highlight information.
Editing Photos: 7 Editing Tips for Your Travel Photos
1. How to Crop Your photos
The crop tool allows you to change the size of your image, and also to change the aspect ratio. For example, you can crop an image from a rectangular shape to a square shape. There are many reasons you would want to crop, including for publishing in different formats and aspect ratios.
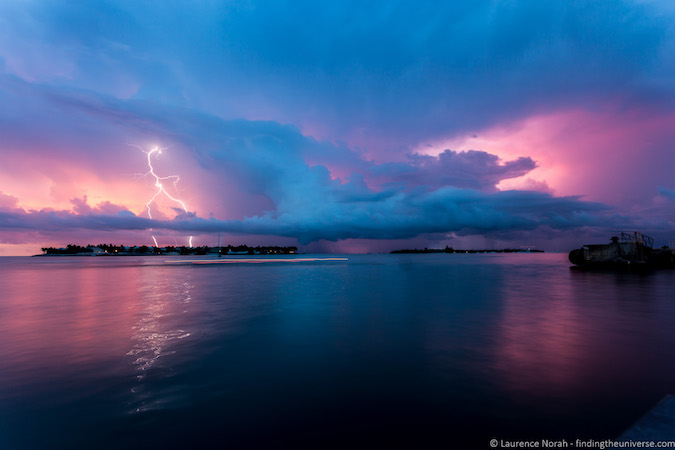
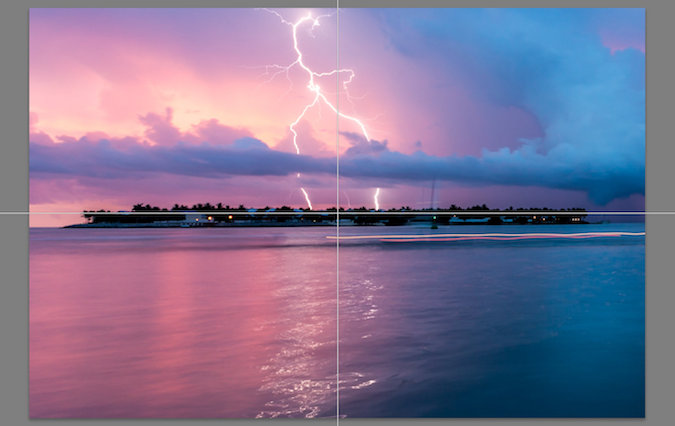
Let’s take a look at the first photo from this post, a lightning shot I took on a recent trip to the Florida Keys. Here’s the original version without cropping:
And the edited version, post-crop:
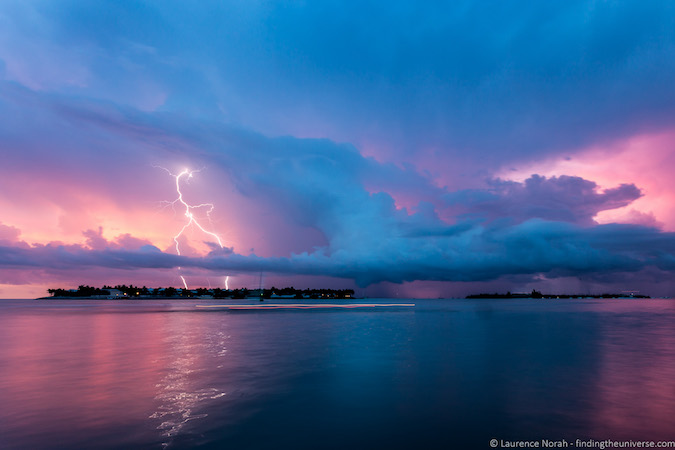
Compared to the original, I have cropped the image to remove the dark part of the pier on the right-hand side of the image and recomposed using the rule of thirds, so I have one-third land and two-thirds sky. This makes the lightning bolt more the focus of the shot.
You might wonder why I didn’t just compose properly when taking the shot. Well, in this case, I was doing a long-exposure shot without a tripod, so had the camera balanced on the edge of the pier for stability. That very much limited my ability to perfectly frame the moment, so I just shot wider, knowing I’d be able to crop the shot appropriately after the fact.
Let’s look at what cropping looks inside a couple of the tools available.
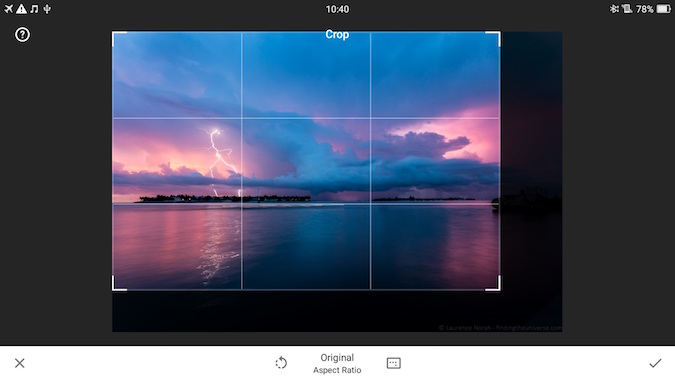
Here’s an example of cropping in Snapseed:
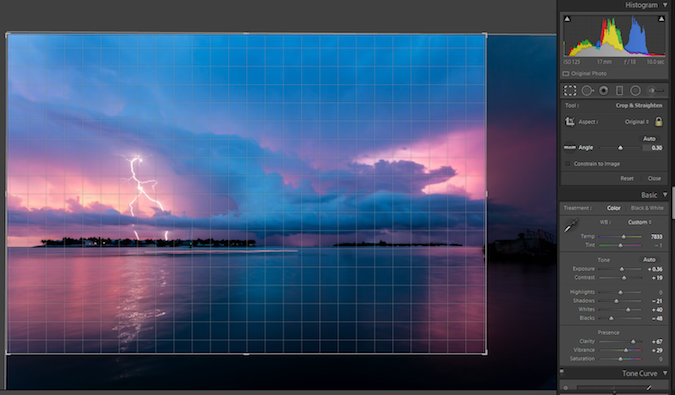
And the same thing in Lightroom:
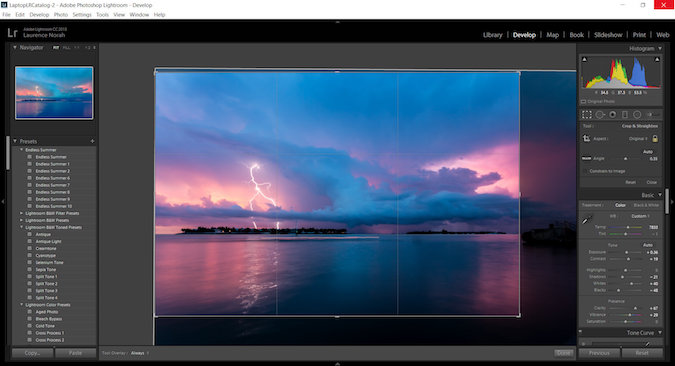
In both cases, cropping is very simple: it just involves you selecting the crop tool and then selecting the area you want to keep with your mouse or finger. Then you apply the changes, and voilà, your new cropped image is ready to go.
As you see from this and later examples, the tools look similar across different platforms, so it’s easy to apply the learning you have from one tool to another.
2. How to Level Your Travel Photos
One of my personal petty annoyances in photography is when the horizon line in a photo isn’t level. Sometimes when we’re caught up in the moment, this basic compositional rule is forgotten — but the good news is that editing your photos to make them level is also very easy.
I’ll use the lightning shot as my example again. Balancing the camera on the edge of the pier meant that the shot wasn’t level — this is particularly noticeable to the eye when the image has a clearly defined horizon line, such as the sea.
If we look at a zoomed in version of the image in its original form, with a line overlaid near the horizon, we can see that it’s not level — the line is closer to the horizon on the right-hand side than the left.
In Lightroom, the level tool is part of the crop tool, and you can just rotate the image to suit. When you use the level tool, a grid will appear to help you get the alignment correct. Here’s a screenshot of that in action in Lightroom.
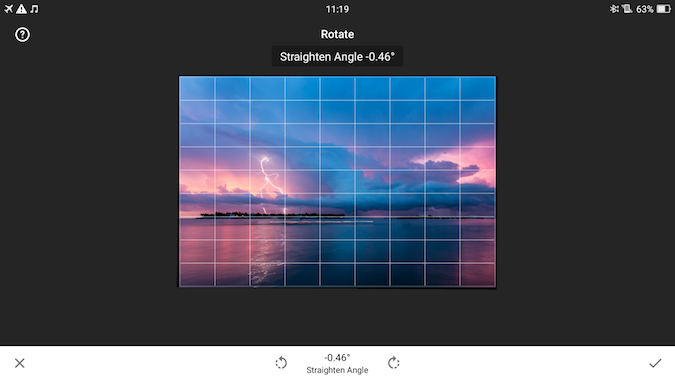
And here’s the same procedure in Snapseed, where the level tool is called “Rotate”:
Leveling an image is a really simple task that will take just a few seconds of your time, resulting in a much more visually pleasing image.
3. Vignetting Your Photos
Vignetting is about making parts of the image darker or lighter than other parts, in order to make it clearer what the subject of the shot is.
Some tools restrict your vignette to the corners, but in applications like Snapseed and Lightroom you can selectively darken and lighten areas of the image — you don’t need to restrict yourself to the corners.
Taking the lightning shot above, let’s load up the vignette tool in Snapseed.
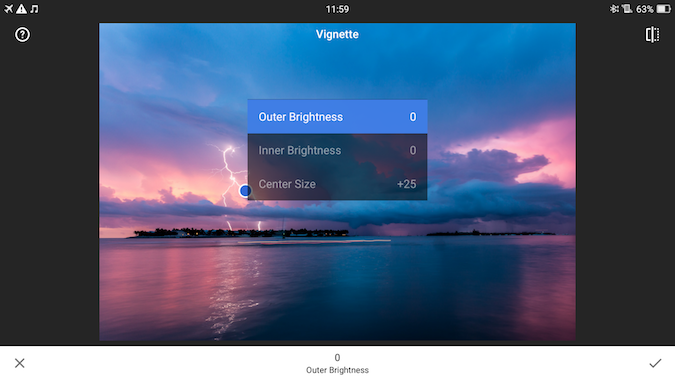
Here we have options for how big to make the “center size,” i.e., the area to be edited. Inside this area, everything can be made brighter (inner brightness) and everything outside the area can be made darker (outer brightness). We can also do it in reverse, making the inner darker and the outer brighter.
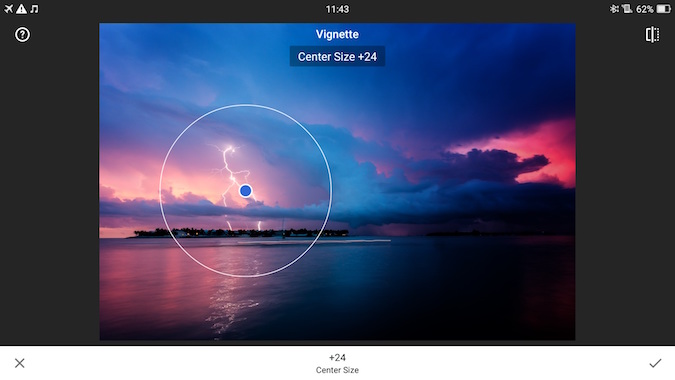
Let’s apply the vignette tool to the lightning bolt, to give you an idea of the effect:
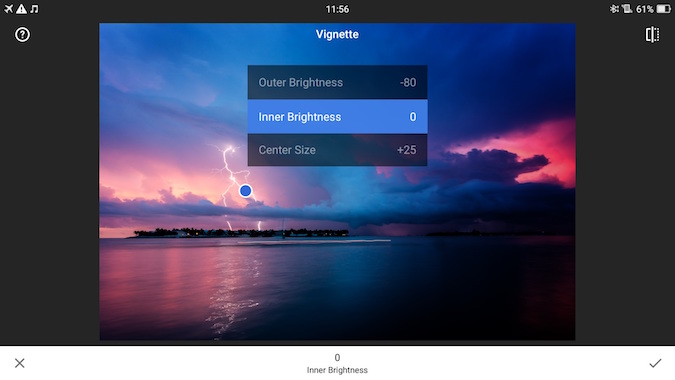
Above are the settings I chose for outer brightness and inner brightness, while below is the size of the vignette itself, which is based on the center size setting.
Vignetting is particularly good for portraits, and anywhere where you really want to make the subject of the image more clearly obvious to the viewer.
4. How Change Shadows and Highlights in Your Photos
Sometimes when we take a photograph, parts of the shot might end up being darker or brighter than we want. We refer to the dark areas of the shot as shadows, and the bright areas of the shot as highlights.
We can fix this by changing the brightness of the shadow and highlight areas specifically, using either the “Shadow” or “Highlight” tool. This is a tool that works particularly well on RAW files as they retain more information on the shadow and highlight areas of an image compared to a compressed JPG, which discards most of this information in order to save file size.
Let’s take a quick look at adjusting shadows and highlights using Lightroom. In Snapseed, shadow and highlight adjustment can be found under the “Tune Image” setting.
Here’s a shot of a couple enjoying a bonfire and fireworks display in Edinburgh during Hogmanay:
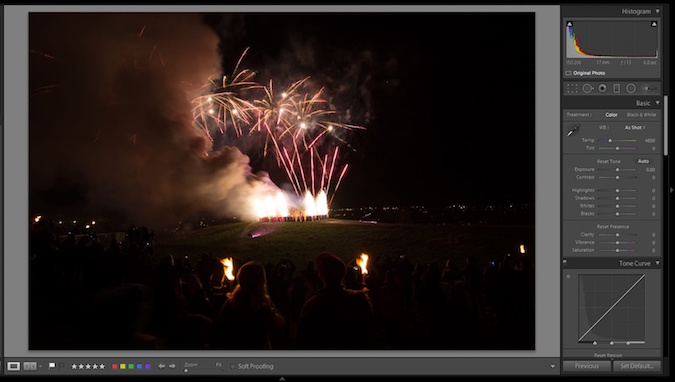
As you can see, the fireworks and bonfire are clearly visible, as are the torches the couple is holding, but the rest of the shot is dark. Let’s adjust the settings and see what we can get.

In this version of the image, the couple is much more visible, as is the hill the fireworks are on and the surrounding crowd.
To achieve this I increased the overall exposure of the image, making the whole image brighter, including the shadows and the highlights.
Then, as the shadow areas were still a little dark, I increased those a little more.
Finally, as the global exposure adjustment made the fireworks and bonfire too bright, I reduced the highlights a little bit to give the final result.
Shadow and highlight adjustment is useful in a wide range of scenarios to help balance the image out — bringing overexposed areas down in brightness, and helping to boost the shadows. Just be aware that a light touch is recommended — increasing the brightness of the shadows too much can result in a lot of noise being revealed, which might look unnaturally green or purple.
5. How to Adjust the Contrast
Contrast is about accentuating the difference between the light and dark parts of the image. Increasing the contrast of an image can dramatically improve the visual impact that has, by making the boundaries between those light and dark parts clearer.
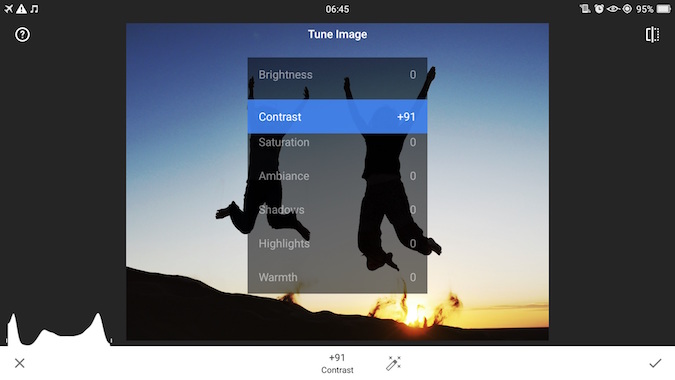
Let’s take a look at a shot of people jumping against the sunset in the Sahara, for example, which I’ll be editing in Snapseed.

There is nothing too wrong with this shot, but it lacks the visual impact that I wanted. Ideally, I would want the shapes of the people to be in full silhouette against the sun, but as it was shot the camera picked up some skin tones and clothing color.
Using the contrast tool, we can make the dark areas stand out against the bright areas.
And here’s the result:
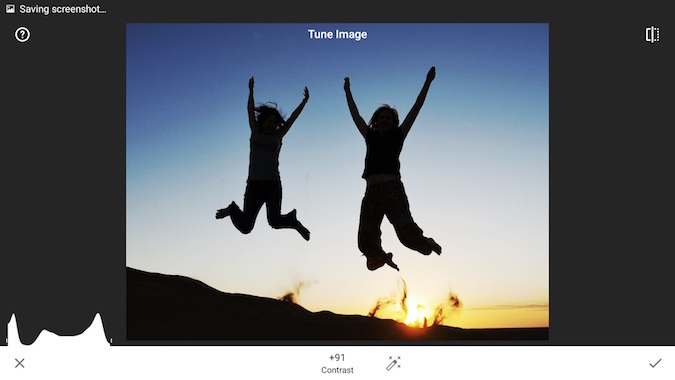
As you can see, this made the jumping figures and the dune more silhouetted against the sky. In most shots, you only want to tweak the contrast a little bit to get the desired effect, normally no more than +20 or so, but in this case, the higher number gave the best result.
6. How to Adjust Colors
Color adjustment is another important piece of the editing toolkit. We can adjust image color in all sorts of ways, from changing the overall “warmth” of the image (how blue or yellow it appears), to individually changing the hue and saturation of specific colors inside an image.
For this post, though, I just want to cover some very simple color changes you can use to make your images just a little more visually impactful.
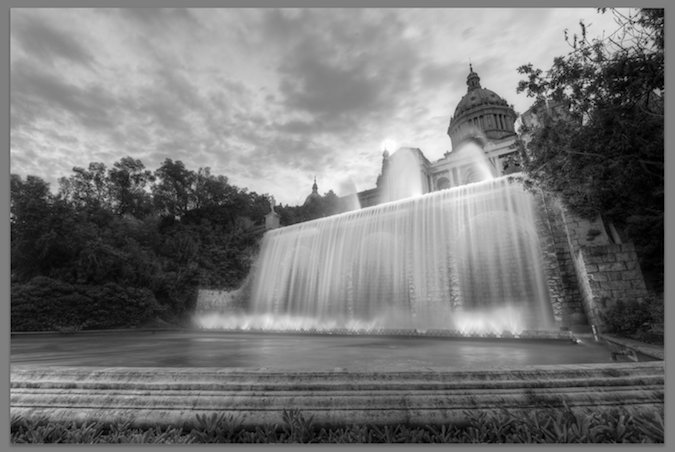
The fastest way to adjust an image’s color is with the “Saturation” tool. This changes the appearance of every color in an image to make it more or less saturated. We can use the saturation tool to desaturate an image, eventually resulting in a black-and-white image with no color:
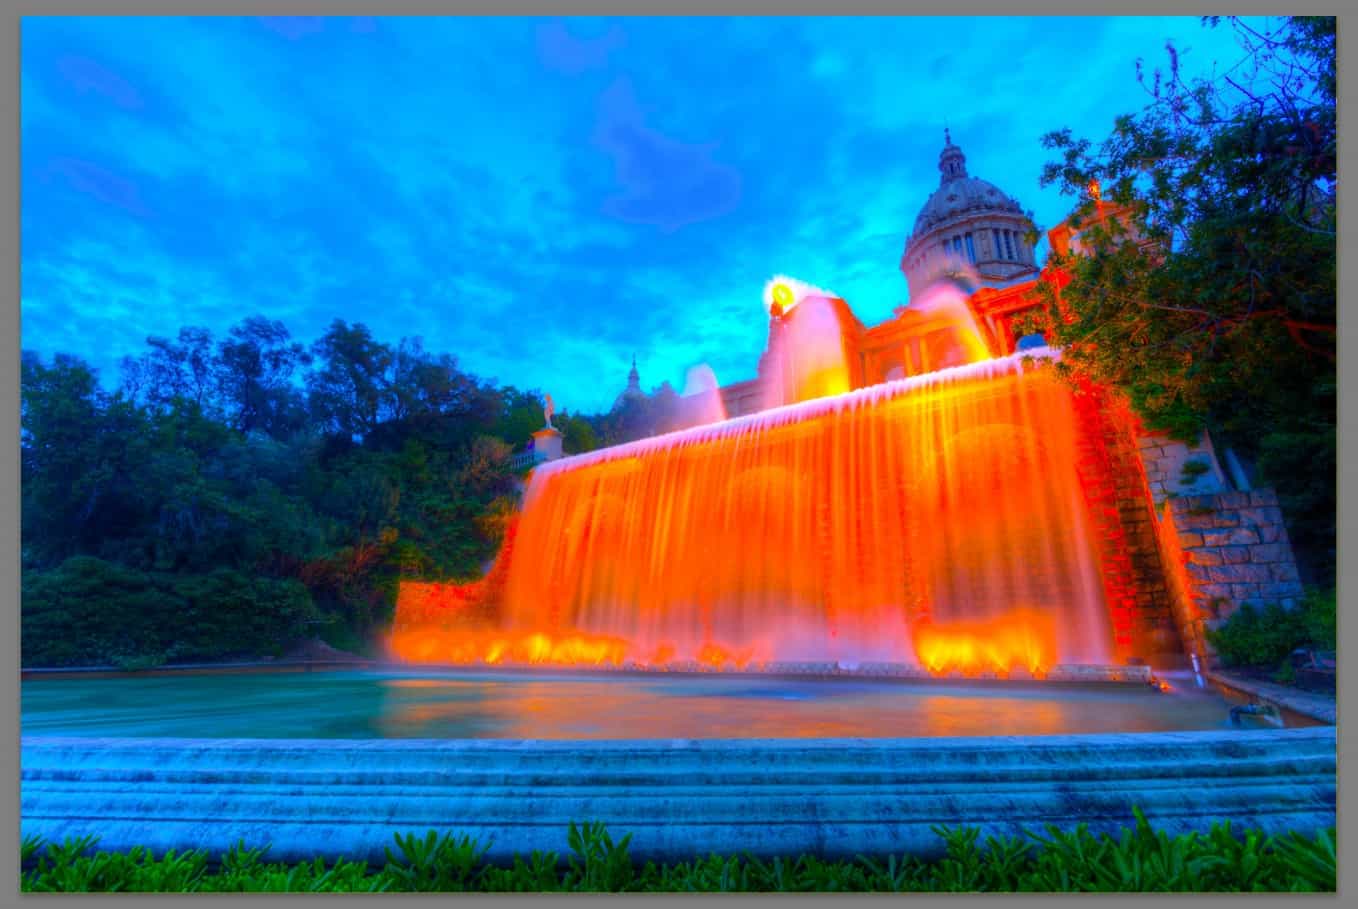
Or we can go all the way to the other end of the spectrum, and make the color incredibly saturated:
As with many edits, the key is to find a good balance — oversaturated images tend to look rather unnatural. Desaturated images can be very effective, and of course black-and-white is an excellent choice for all sorts of situations, in particular, portraits, architecture, and certain landscape scenes. But generally you would want to find a happy midpoint: not too oversaturated and not too undersaturated.
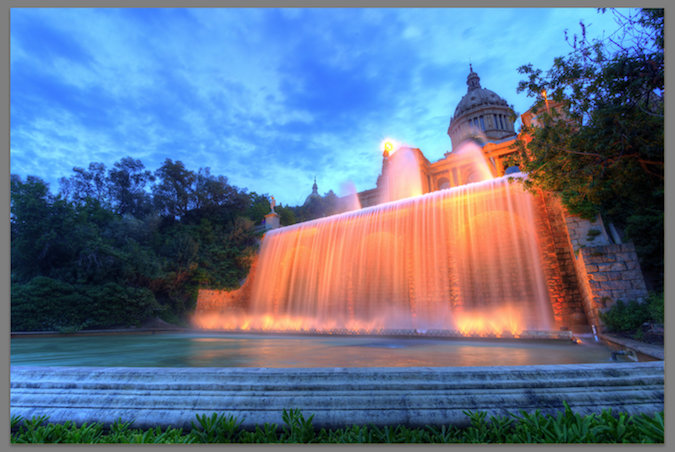
Saturation is adjusted on a sliding scale and is on the basic adjustments panel in Lightroom or the “Tune Image” option in Snapseed.
7. Blemish correction
The last area I’m going to touch on today is blemish correction, or “image healing.” Sometimes there will be something in an image that you really don’t want to be there, like an inconvenient pimple on someone’s face. This is easy to remove in all the major editing tools.
You can, in theory, remove any object from a scene, but the healing tool works best on distinct, small objects that are surrounded by uniform colors. This is because the heal tool has to replace the area you wish to remove with something else, and this works best when it has an area nearby that looks similar. So for example, a pimple on a face is surrounded by a lot of similarly colored skin, so the heal tool can easily calculate what to replace the pimple with based on the surrounding area.
For this example, I’m going to show how Snapseed can be used to replace an object in a scene. Here’s a group of people sitting on a sand dune in the Sahara:
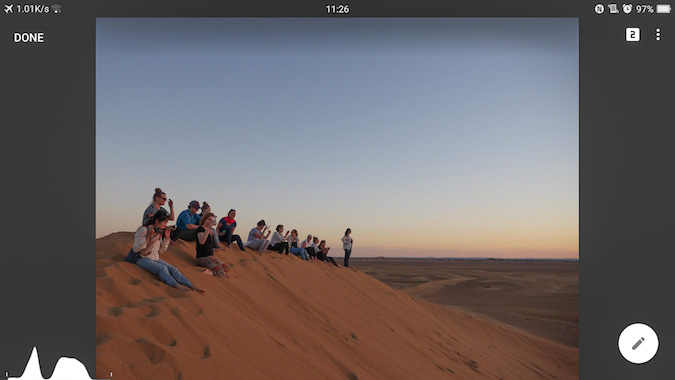
Let’s say for some reason I only wanted to have people sitting in my shot, and I need to remove the standing person. She is a good candidate for removal as she is separate from the rest, and the surrounding scenery is not too complicated.
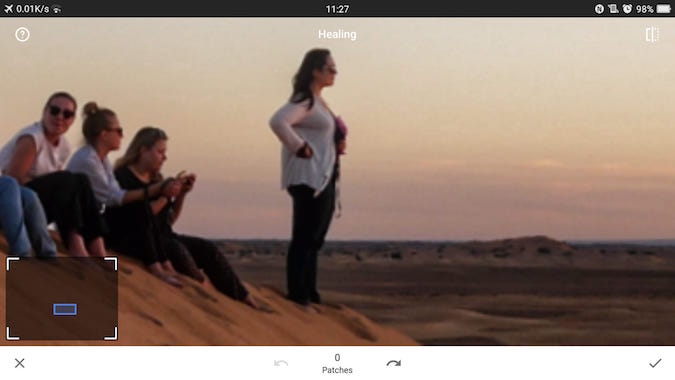
In Snapseed, we load up the healing tool, then we zoom in on the object to be removed with the standard “pinch to zoom” gesture.
Next, we use our finger to draw the area to be removed. It’s important to be as precise as possible because the tool is most accurate with small objects.
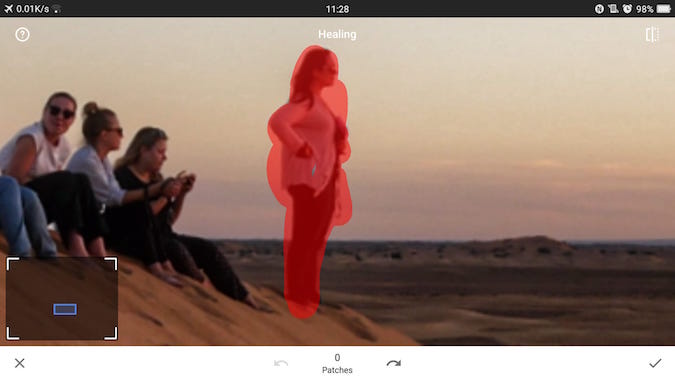
Once we have drawn the area, Snapseed will edit it out, replacing it with the best guess of what is behind the object.
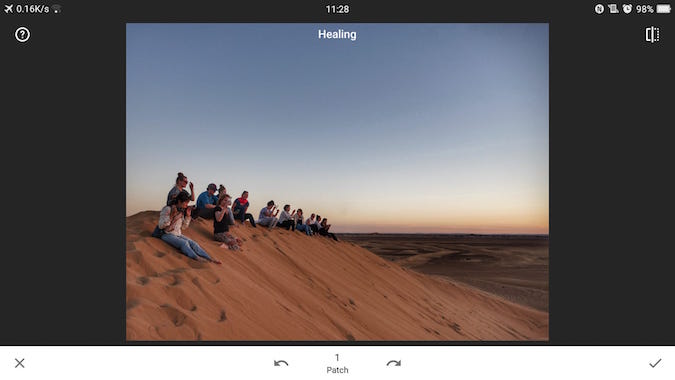
As you can see, the result is impressive, with no real evidence that there was anyone standing there at all.
The healing tool is perfect for all manner of fixes, from editing out unwanted background strangers in your shot, to removing skin blemishes in portraits or power lines in landscape shots.
Best Photography Editing Software
Here is a list of the best editing tools out there:
- Adobe Lightroom (PC or Mac) – Lightroom is the industry standard tool for photography professionals. But this post is not going to focus on Lightroom, nor cover everything you can do in Lightroom, as it’s a massively complex tool, covering both photo management and photo editing.
- iPhoto (Mac) – I list iPhoto here mainly because it’s a commonly used tool among Apple users. However, I personally never recommend using it. While it will let you do everything that I cover in this post and is better than nothing, the way it manages your photos makes it hard to migrate to a more sophisticated system further down the line if you choose to do so.
- Picasa (PC or Mac) – Picasa is a free desktop photo editing application from Google. It’s very simple, but it allows you to do everything I’m going to cover in today’s post. If Lightroom is a bit overwhelming, Picasa is a great, free place to start.
- Snapseed (iOS or Android) – Another free Google tool, Snapseed is the best mobile image-editing app for both iOS and Android. It’s an incredibly powerful tool that, while simple to start using, has a great many features that take time to fully master. I use it for 95% of my mobile editing needs.
Let’s take a look now at what you can and should be using these tools for with your images.
***
Editing your photos is a crucial step that far too many people skip. As you can see from this lesson, there is much more to editing your photos than just picking a filter and posting your picture on Instagram. By incorporating some of these tips and techniques into your post-processing routine you’ll be able to improve your travel photography in leaps and bounds.
So get out there and start taking pictures!
Laurence started his journey in June 2009 after quitting the corporate life and looking for a change of scenery. His blog, Finding the Universe, catalogs his experiences and is a wonderful resource for photography advice! You can also find him on Facebook, Instagram, and Twitter.
Travel Photography: Learn More Tips
For more helpful travel photography tips, be sure to check out the rest of Laurence’s travel photography series:
- Part 1 – How to Take Professional Travel Photos
- Part 2 – How to Shoot the Perfect Travel Photograph
- Part 3 – The Best Cameras & Travel Photography Gear
- Part 4 – How to Take the Perfect Photo: Advanced Techniques
- Part 5 – 7 Editing Tips to Improve Your Travel Photographs
LEARN TO GET OUT OF AUTO!
 If you are looking to really get into photography and want to master your camera and take amazing photos when you travel, Laurence and I have developed a comprehensive photography course that will get you out of auto and have your friends go “Wow! That’s really breathtaking!” in no time. Click here to learn more about the course and start today!
Book Your Trip: Logistical Tips and Tricks
Book Your Flight
Find a cheap flight by using Skyscanner or Momondo. They are my two favorite search engines because they search websites and airlines around the globe so you always know no stone is left unturned.
Book Your Accommodation
You can book your hostel with Hostelworld. If you want to stay elsewhere, use Booking.com as they consistently return the cheapest rates for guesthouses and cheap hotels. I use them all the time.
Don’t Forget Travel Insurance
Travel insurance will protect you against illness, injury, theft, and cancellations. It’s comprehensive protection in case anything goes wrong. I never go on a trip without it as I’ve had to use it many times in the past. I’ve been using World Nomads for ten years. My favorite companies that offer the best service and value are:
- World Nomads (for everyone below 70)
- Insure My Trip (for those over 70)
Looking for the best companies to save money with?
Check out my resource page for the best companies to use when you travel! I list all the ones I use to save money when I travel – and I think will help you too!
The post 7 Editing Tips to Improve Your Travel Photographs appeared first on Nomadic Matt's Travel Site.
from Nomadic Matt's Travel Site https://ift.tt/2QF6Ddy
No comments:
Post a Comment